Normally, when you print in cyanotype (or any other alternative photographic processes) you have to face a step in the negative calibration where you want to reach “paper white” in your test print, and only in the last steps of the step tablet you printed.
Paper white is the lightest color you can have on a print, that is the color of the paper itself. If your paper is creamy your “paper white” will be that creamy color. With a limit, because even with the best coating and washing practices there will always be a residue of emulsion on the paper causing a barely visible fog, so you’ll have a creamy+fog color as your paper white.
Having paper white in your print depends on the density of your negative. If the negative is dense enough (dark enough) light won’t pass through it during exposure and therefore under the darkest part of the negative your print will be paper white. If the negative is not dense enough and you can’t raise the ink level you probably need to reduce your exposure time (or raise density with a color).
You want to have paper white only in the last steps of your test print. If you are having a lot of paper white in your test print (typically a 256 step tablet) you can compensate in two ways: reducing the ink density level (if your printer driver allows that) or, in cyanotype, using citric acid in the first tray when developing the print.
The paper white on your print depends on how long your exposure time will be and, at the end, how dense your negative is, so the printer you use is crucial for this experiment, a printer with pigment based inks will give you a denser negative than a printer with dye based inks. Also, a printer where you can change the ink density (quantity) level from its driver will be able to give you the chance to change the maximum density of your negative to match the exposure scale that you need. That is you can change the ink density to move the paper white only in the last steps of the step tablet you printed, not before nor after.
If your negative is very dense and you can’t or don’t want to change the ink density level, and so you have a lot of paper white in your test print, you can develop your print in Citric acid to extend the exposure scale of your print and so have paper white only in the last steps. You will have great results if the acid is used in the correct amount. It degrades in high staining (no paper white) if too much acid is used.
I did a few tests using citric acid on Arches Platine and sulfamic acid with Canson XL Watercolor paper, the former paper being pure cotton without alkaline reserve, and the latter a fully buffered paper that needs much more to be happily printed with.
To have the acid ready to use I prepare a 10% solution, stored in bottles, starting from the raw crystals. So I use a syringe to measure the quantity I need and put it into my water tray, I stir the water for a while and I am sure all the acid crystals are already completely dissolved and the acid completely mixed into the developing water, for consistency that is the base for a perfect digital negative.
For Arches Platine I tested:
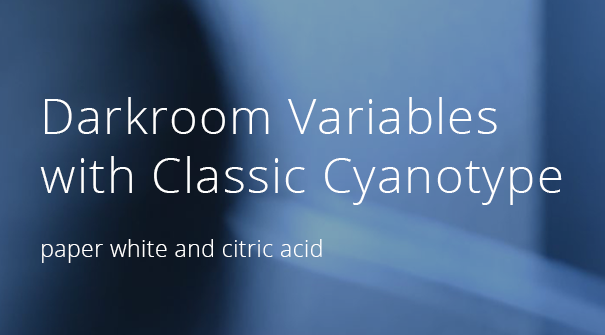
- 1 ml (of 10% solution) of citric acid per liter of dev water (image below).
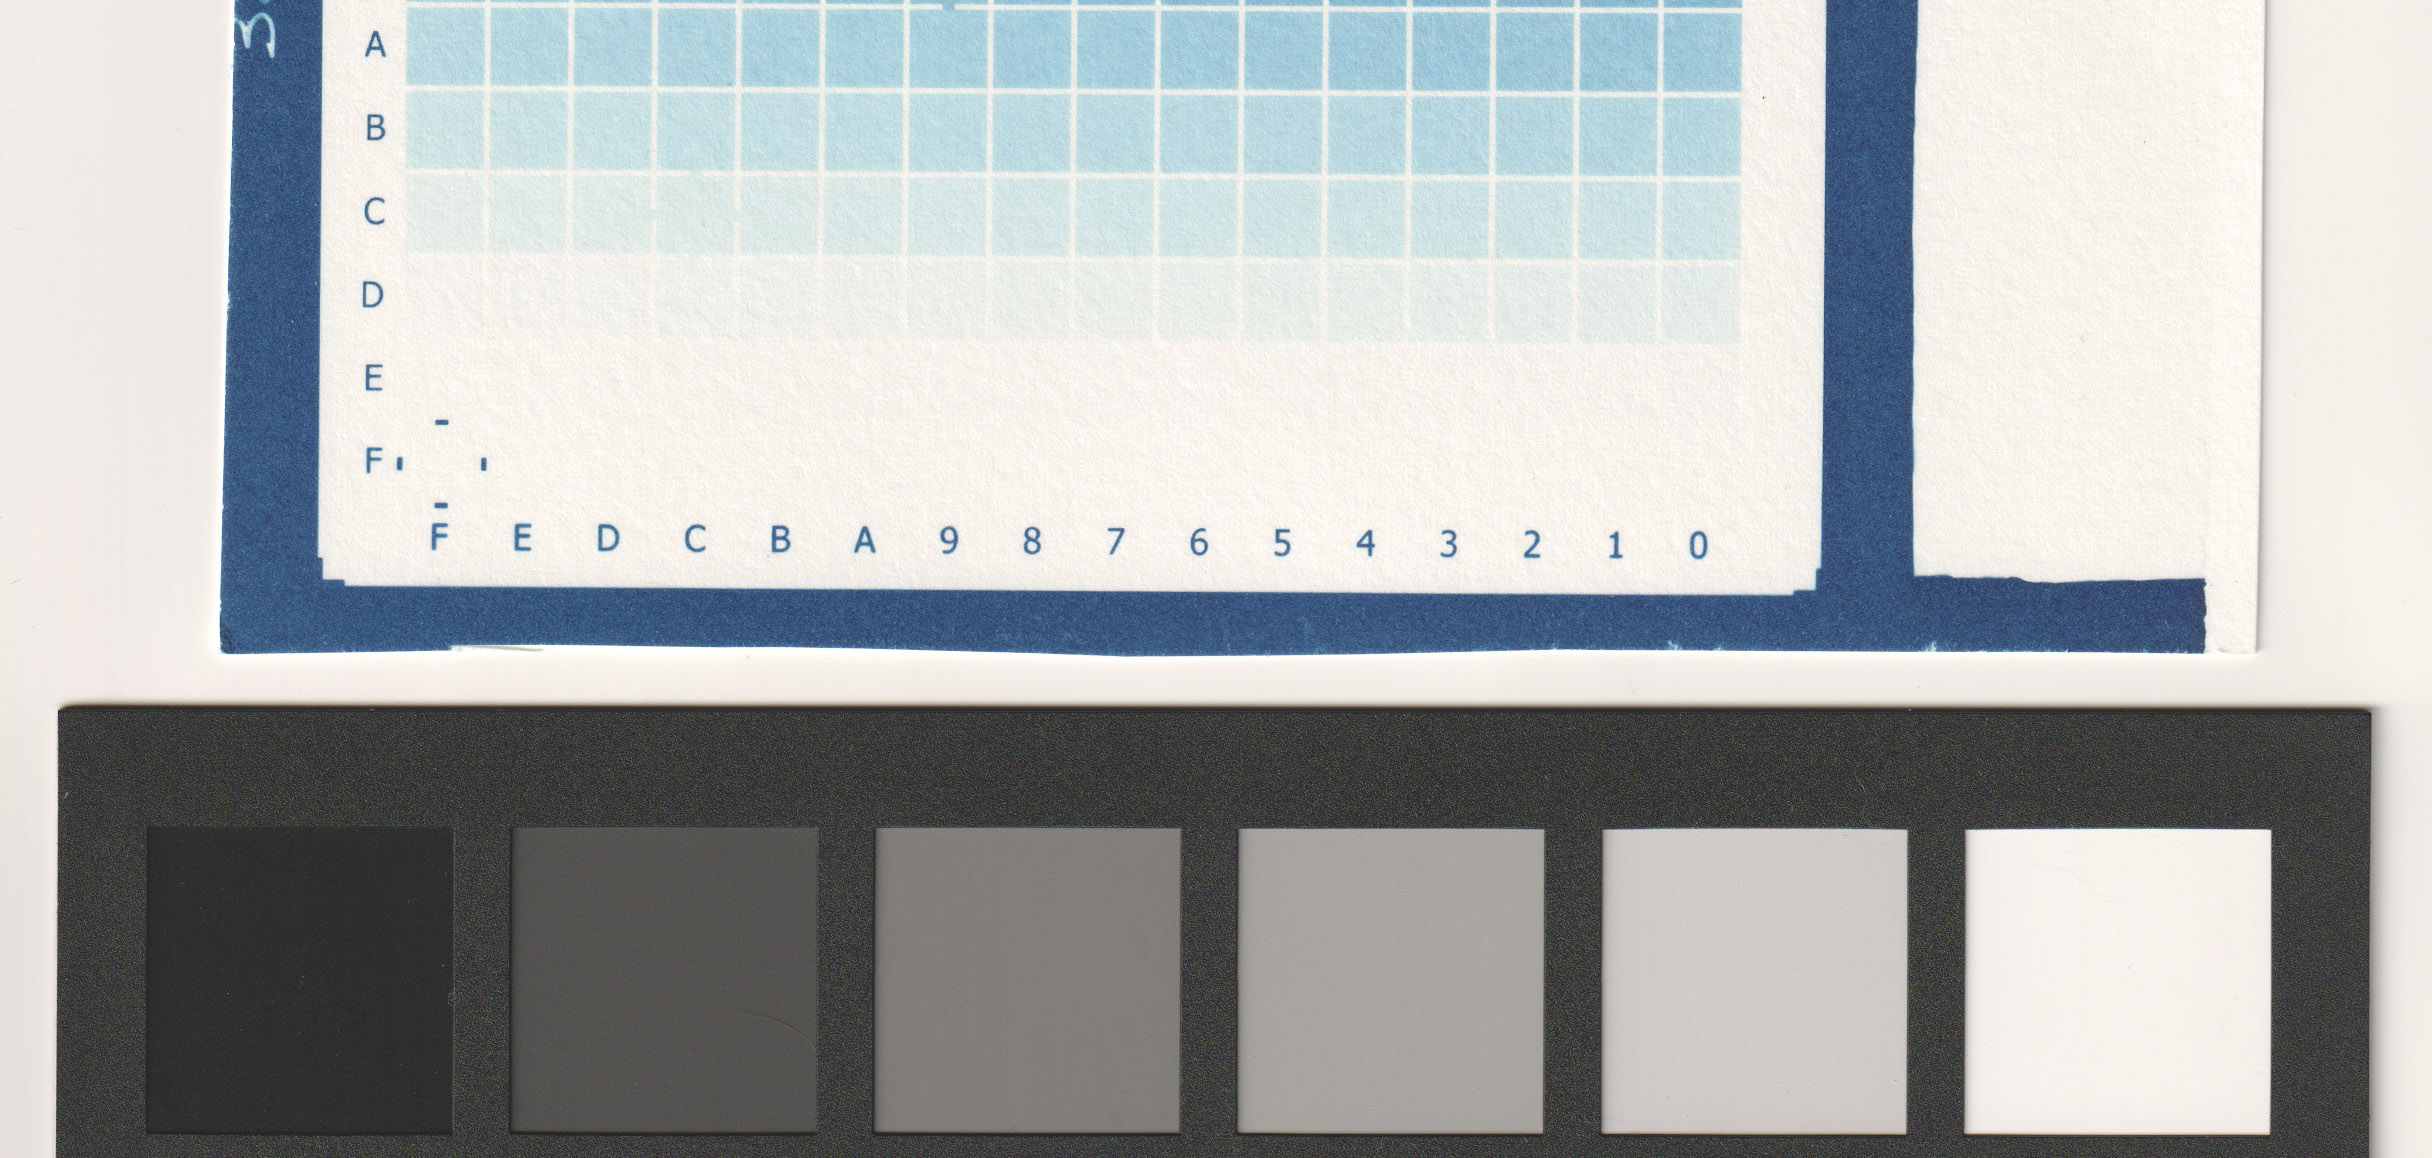
- 3 ml (of 10% solution) of citric acid per liter of dev water (image below).
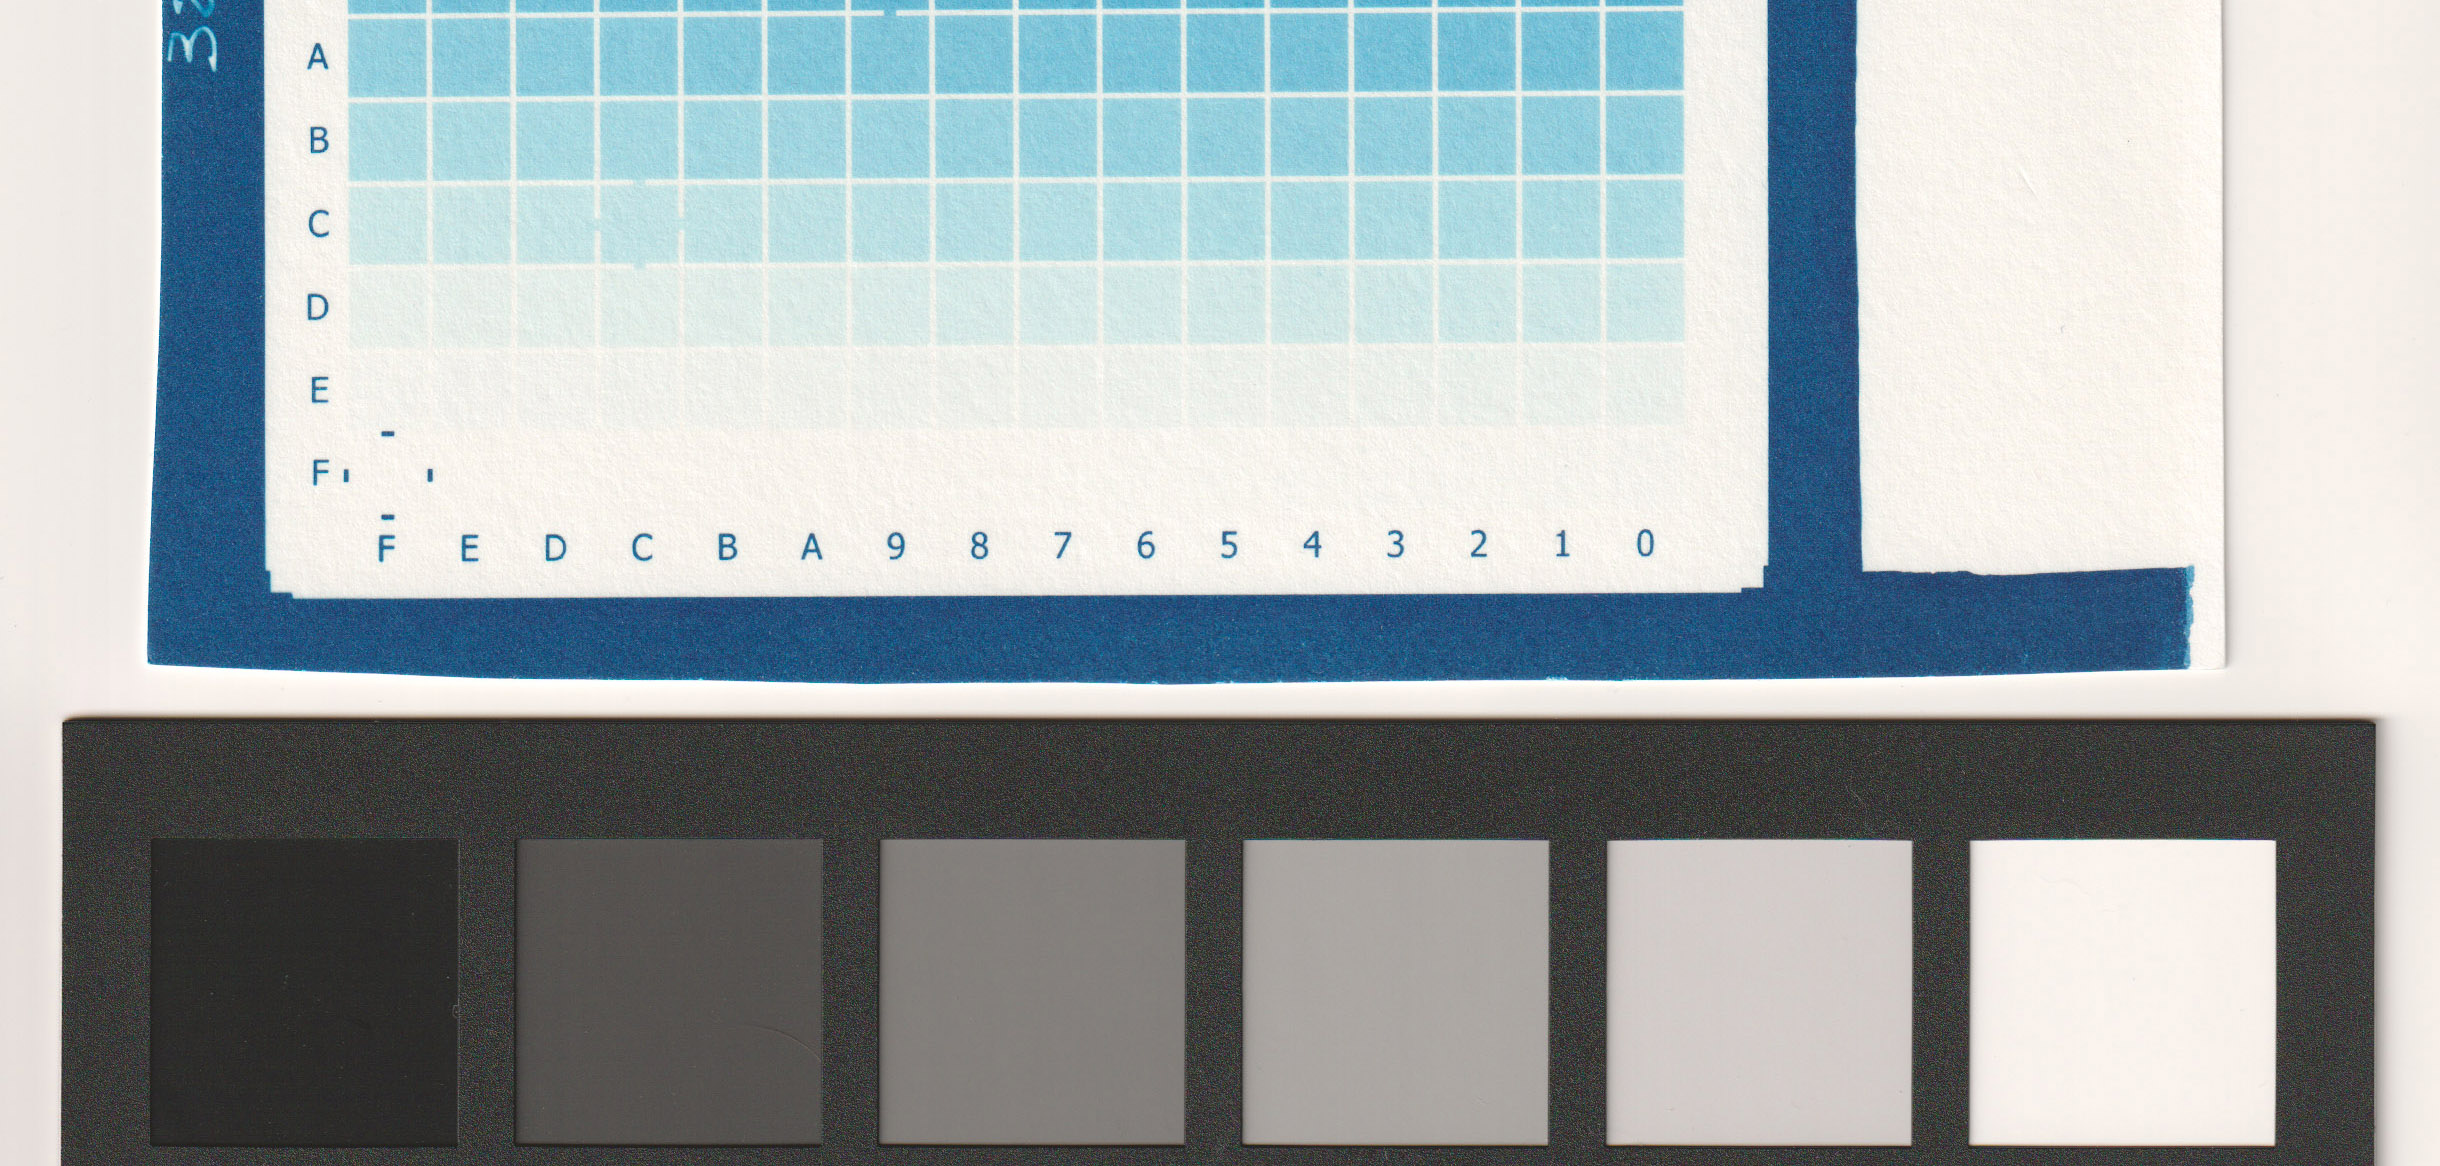
- 5 ml (of 10% solution) of citric acid per liter of dev water (image below).
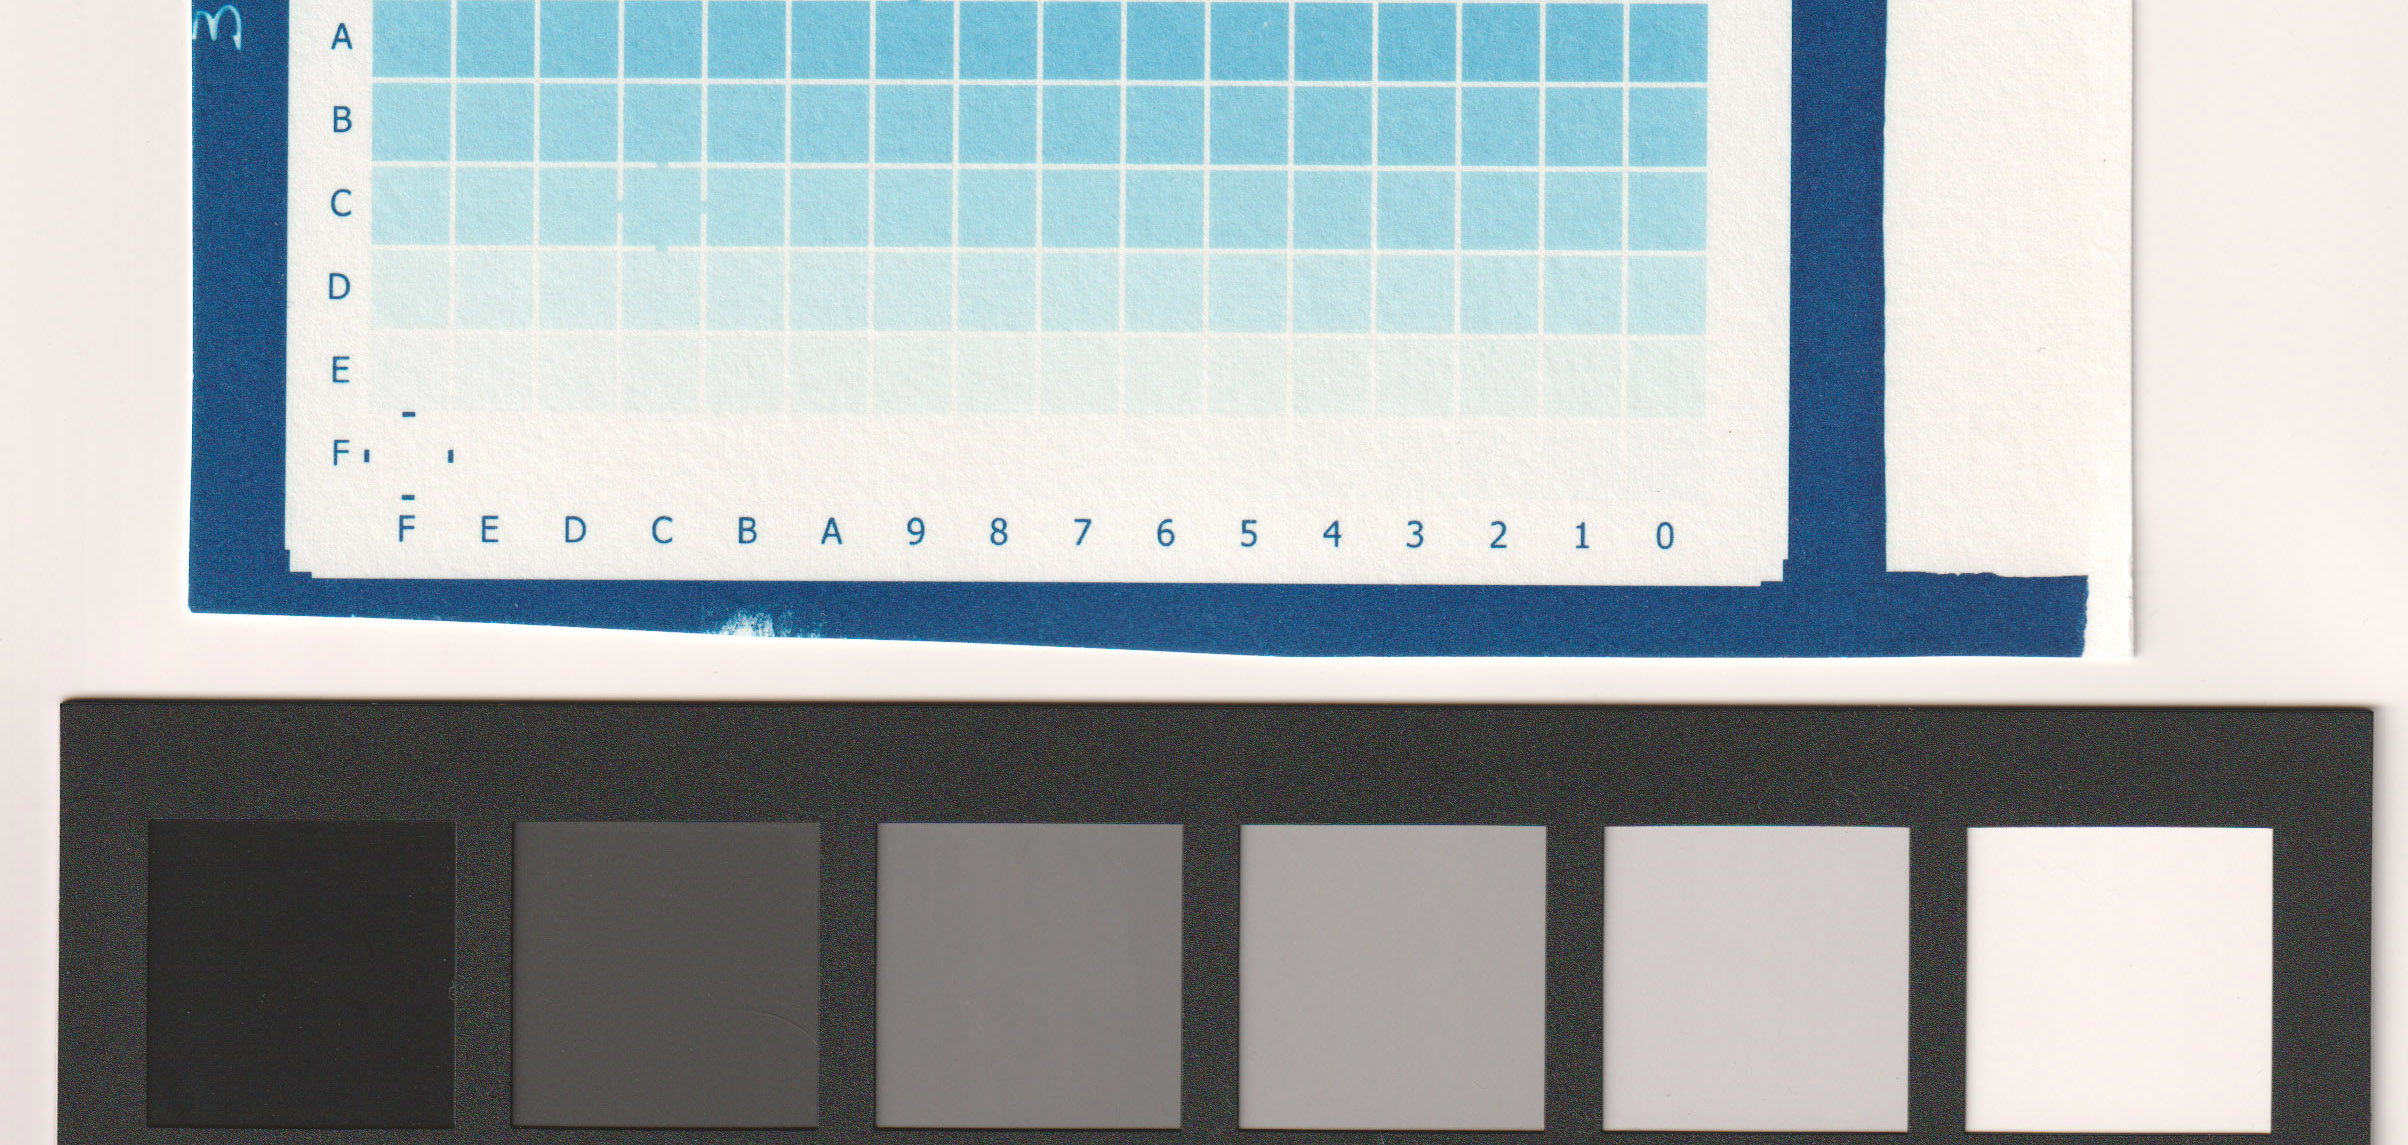
- 10 ml (of 10% solution) of citric acid per liter of dev water (image below).

For my process (sum of all my variables including paper type, relative humidity, type of coating, printer model and settings, etc) my best results were between 5 ml/l (very good) and 10 ml/l (less paper white) as you can see from the images. I decided to go with 5ml/l in the first developing tray for a perfect digital negative.
P.S. The tap water where I live is desalinated from the sea, and comes with a pH of 9 – 9,5 very alkaline for cyanotype prints that would be bleached if washed into that water. To compensate that alkalinity it is only necessary a 0,3 ml/l (10% solution) of citric acid, so all in all a bare 0,03 grams of citric acid salts disolved into one liter of water are able to make that water neutral. You want to make sure to have neutral tap water before washing your cyanotype into it.
P.P.S. As a side discussion, I know that the pH paper test strips have a shelf life of two-three years in general (and you don’t know for how long your provider had kept them in his shelf), and also depending on the accuracy used by the producer you need to be careful when using any pH tester for cyanotype (also the electronic devices). I use a liquid pH test for aquariums that comes with an internal color reference scale printed in good quality. Testing and your eyes can be a good tool anyway.
This is an external resource for cyanotype printing of the Digital Negative video course. You can read more about it clicking HERE.